Sensors & DIY

DIY

Cheaper builds, ready kits, example BOMs, and a path to AI. No made-up AliExpress SKUs or prices — only roles, quantities, and search keywords.

Electronics and DIY at your own risk. Avoid mains voltage if unsure; keep sensors isolated from irrigation.

Example shopping lists (BOM) · What to measure where · Cheaper buying

Example shopping lists (BOM)

Example shopping list, not a product recommendation. No AliExpress SKUs or prices — only part roles, quantities, why, search keywords, and tips.

Electrical safety: mains voltage (230 V) only if you know what you’re doing; prefer 5 V / 3.3 V and isolated relays. Outdoors and in domes: IP rating and dry joints. Calibrate sensors — raw ADC is not a percentage.

Home growing

ESP32 (or equivalent) + capacitive soil moisture + DHT/BME temp-humidity + optional grow-light relay. Indoors: power, enclosure, cables.

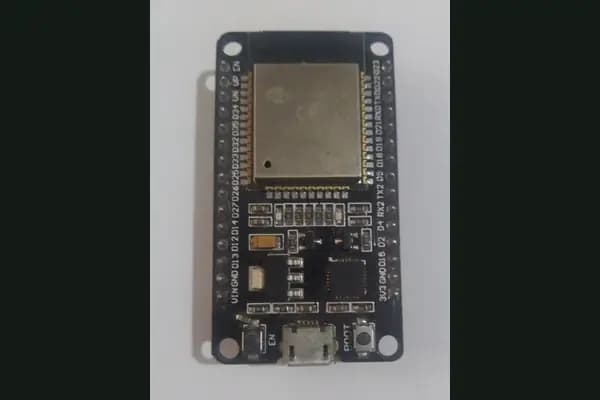
  • Microcontroller (ESP32 DevKit)
    1
    Wi-Fi node: reads sensors and sends MQTT/HTTP.
    ESP32 DevKit C USB-C 30pin
    3.3 V logic. Don’t feed 5 V signals straight into GPIO.
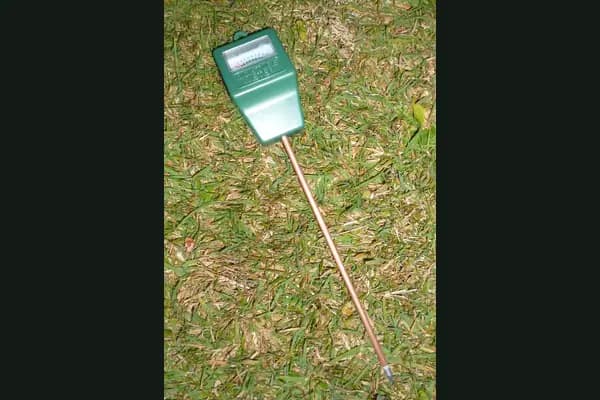
  • Capacitive soil moisture sensor
    1–2
    Watering timing in pots/boxes without guessing.
    capacitive soil moisture sensor v2.0
    Calibrate dry/wet. Don’t submerge the electronics head; resistive forks corrode.
  • Air: temp + humidity (DHT22 or BME280)
    1
    Indoor climate and mold/dryness risk.
    BME280 3.3V I2C | DHT22 AM2302
    BME is more accurate; DHT is fine to start. Keep the sensor off direct watering.
  • Grow-light relay (optional)
    0–1
    Timed LED lighting without a manual switch.
    relay module 3.3V optocoupler 1 channel
    Mains only via an isolated relay / ready LED driver. If unsure, use a plug-in timer.
  • USB 5 V power supply
    1
    Stable power for ESP32 and sensors.
    USB-C 5V 2A power supply
    Don’t pull everything from a weak USB hub. Long cable → voltage drop.
  • Enclosure / project box
    1
    Protects electronics from dust and knocks.
    electronics project box IP54
    Cable holes; keep joints dry. Indoors IP54 is often enough.
  • Wires + breadboard
    1 set
    Quick wiring before soldering.
    Dupont jumper wire M-F breadboard
    Label 3.3 V / GND / data. Disconnect power before changes.
  • Lux light sensor (optional)
    0–1
    Checks if window/LED light is enough.
    BH1750 light intensity sensor
    Lux ≠ PAR; indicative indoors.

Garden bed (outdoors)

Outdoor garden: soil moisture, outdoor temp probe, optional drip-timer interface, weather-resistant box.

  • Microcontroller / node (ESP32)
    1
    Local sensing and Wi-Fi/MQTT link.
    ESP32 DevKit waterproof enclosure kit
    Keep electronics in a dry box; run sensors out on cables.
  • Soil moisture (outdoor)
    1–3
    Rows dry out before leaves wilt.
    capacitive soil moisture waterproof probe
    Calibrate in your soil. Several points beat one “average”.
  • Outdoor temp probe (waterproof)
    1
    Frost warning and watering timing.
    DS18B20 waterproof temperature probe 1m
    1-Wire: ~4.7 kΩ pull-up. Seal the cable gland.
  • Drip-timer interface (optional)
    0–1
    Timed valve/pump in dry spells.
    solenoid valve 12V garden relay MOSFET
    Use a low-voltage valve + separate PSU. Never put 230 V on a GPIO.
  • Weather-resistant enclosure
    1
    Rain, dew, and UV kill open boards.
    IP65 junction box cable gland
    IP65+ recommended. Silicone / glands; a pressure-equalization hole reduces condensation.
  • Cables & glands
    as needed
    Long runs to the row without voltage drop.
    cable gland M16 silicone sealant outdoor wire
    Service loops; label ends. Surge/grounding if long antenna/cable.
  • Weather / rain (optional)
    0–1
    Skip watering after rain.
    rain gauge tipping bucket I2C weather
    Not required at first — eyeball rain + soil moisture is enough.

Dome / greenhouse

Climate first: temp+humidity, soil moisture, fan/relay for vent. Advanced: CO₂ or PAR.

  • Microcontroller (ESP32)
    1
    Owns sensing and vent logic.
    ESP32 DevKit C 3.3V
    Keep the board out of direct sun and wet soil.
  • Climate: temp + RH
    1–2
    Overheating and high RH → disease risk.
    BME280 3.3V | SHT30 SHT31 I2C
    Mount at plant height, not the hottest roof pocket. Splash protection.
  • Soil moisture sensor
    1–3
    Zone watering without guessing.
    capacitive soil moisture sensor
    Calibrate for the medium (peat vs. soil differs).
  • Fan + relay / MOSFET
    1
    Drops humidity and evens temperature.
    DC fan 12V PWM MOSFET module relay 3.3V
    Match fan voltage. Mains blower → pro install / ready controller.
  • Enclosure for humid space
    1
    Condensation is normal in a dome.
    IP65 enclosure DIN rail electronics
    Anti-condense care; keep I2C sensor outside the box on a short cable.
  • CO₂ sensor (advanced, optional)
    0–1
    Fine-tune ventilation in a closed space.
    MH-Z19 CO2 sensor UART NDIR
    Needs warm-up/calibration; not required for hobby domes.
  • PAR / quantum (advanced, optional)
    0–1
    Compare grow light vs. shading.
    PAR quantum sensor analog I2C grow
    Costly vs. benefit — lux is often enough as a guide.

Field / scouting kit

Multi-depth moisture, soil temp, logger/MQTT gateway, solar/battery at a high level, optional camera. Aerial mapping → XAG workflow on the field page.

  • Multi-depth moisture (concept)
    2+ points
    Surface vs. root zone — irrigation and drought calls.
    soil moisture probe multi depth profile sensor
    Two capacitive probes at depth is a DIY start; pro profile probes are their own category.
  • Soil temperature probe
    1–2
    Sowing and growth timing in a cold spring.
    DS18B20 waterproof soil temperature
    Place at root depth; log the depth.
  • Logger / MQTT gateway
    1
    Timestamped values from the field into the LAN/cloud.
    ESP32 MQTT gateway LoRa soil sensor node
    Start with MQTT + CSV. Long range → LoRa/other radio (high level).
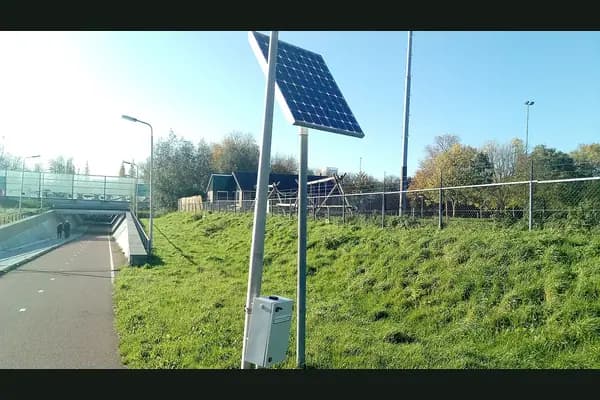
  • Solar + battery (high level)
    0–1 set
    No mains on the plot.
    solar panel 6V 12V charge controller LiFePO4
    Size for load (deep sleep!). Don’t improvise lithium safety — use a proper charger.
  • Weather / rain (optional)
    0–1
    Tie to field checks: when to drive, when to wait.
    weather station rain wind DIY MQTT
    Public weather + your moisture may be enough at first.
  • Scouting camera (optional)
    0–1
    Edges and stress show in images; doesn’t replace a visit.
    IP camera outdoor RTSP local storage
    Prefer local storage; mind privacy. Drone/aerial → separate XAG path.

Aerial mapping and drone scouting: see the field section’s step-by-step XAG workflow. XAG workflow · XAG guide

What to measure where

Pick sensors for where you grow. Home and dome often need air and light; the field needs soil and depth.

Soil moisture

Timing irrigation. Capacitive probes usually outlast resistive “fork” sensors.

Home · Dome · Field

Soil temperature

Root activity and germination. Waterproof DS18B20-style probes are a common DIY category.

Home · Dome · Field

Air humidity

Disease risk in dome and greenhouse. BME280 / SHT-style combo sensors.

Home · Dome

Air temperature

Climate and need for ventilation. Often on the same board as humidity.

Home · Dome

Light / lux

Indoor LED check. A BH1750-style lux sensor is often enough.

Home · Dome

Rain / multi-depth moisture

In the field, multi-depth moisture and rain help timing — not required on day one.

Field

Ready-made vs DIY

Buy a kit for fast results. Build yourself to learn and tune.

Ready kit

When you want a display, app, or Home Assistant fit without soldering. Good home start.

ESP32 / Arduino + sensors

Typical stack: ESP32/Arduino, capacitive soil moisture, DS18B20 (temp), maybe BME280. Calibrate — raw ADC is not “percent”.

Categories (no SKUs): capacitive soil moisture probe, waterproof temperature probe, ESP32 dev board, 3.3V logic level.

Cheaper buying

AliExpress and similar: search by category, compare reviews, expect wait time and calibration.

What to search

Use English keywords (chips above). Avoid “exact price” promises — prices move.

ESP32 soil moisturecapacitive soil sensorDS18B20 waterproofBME280 humidityBH1750 light sensor

Your own solar sensor: ESP32 + soil moisture

Build a low-cost, solar-powered soil moisture sensor that sends readings straight to the SproutMindAI Sensors page. It wakes every 10 minutes, measures, sends and goes back to deep sleep.

PartQtyPrice (approx.)Note
ESP32 dev board (e.g. FireBeetle ESP32 or LOLIN D32, low sleep current)1€6–15Choose a board with low sleep current and preferably a battery connector.
Capacitive soil moisture sensor v1.2/v2.01–3€2–5 eachDoesn't corrode like resistive probes. Protect the electronics with lacquer or heat shrink.
18650 Li-ion cell (protected)1€5–10Charging below 0 °C is not safe – keep it warm in winter.
Charger module TP4056 (with protection) or CN3791 (MPPT)1€1–6CN3791 makes better use of the panel on cloudy days.
Solar panel 6 V, 1–2 W1€5–12Face south, tilt about 45–60°.
3.3 V low-quiescent LDO (HT7333 / MCP1700)1~€1Needed if the board's own regulator draws a lot during sleep.
Resistors 2 × 100 kΩ2<€1Battery voltage divider to GPIO35.
IP65 junction box + cable glands1€5–10Add a vent hole at the bottom to let moisture out.

Prices are approximate (web shops and AliExpress 2026) and vary. Total about €25–55. Ready-made alternative: Ecowitt GW1100 + WH51 (about $20 + $18, shop.ecowitt.com).

  1. Wire sensor AOUT → GPIO34, VCC → GPIO25 (sensor is powered only while measuring) and GND → GND.
  2. Connect the battery voltage via the divider (100k + 100k) midpoint to GPIO35.
  3. Panel → charger IN, battery → BAT, charger OUT → LDO → ESP32 3V3.
  4. Create a new device on the Sensors page (Own ESP32 sensor) and paste the address into PLANTCARE_URL.
  5. Calibrate: read the value with the sensor in air (SOIL_DRY) and in a glass of water (SOIL_WET).
  6. Upload with Arduino IDE (ESP32 board package 2.x or newer).
Arduino code (ESP32)
// SproutMindAI DIY sensor: ESP32 + capacitive soil moisture sensor + solar
// Posts JSON to SproutMindAI every 10 min, deep sleep in between.
#include <WiFi.h>
#include <HTTPClient.h>

const char* WIFI_SSID = "YOUR_WIFI";
const char* WIFI_PASS = "YOUR_PASSWORD";
// Copy from Anturit -> Add device -> DIY (keep it secret):
const char* PLANTCARE_URL =
  "http://192.168.1.10:3000/api/sensors/json/PASTE_TOKEN_HERE";

const int SOIL_PIN = 34;        // ADC1 pin (works while Wi-Fi is on)
const int SOIL_POWER_PIN = 25;  // powers the sensor only while measuring
const int BATT_PIN = 35;        // battery via 100k/100k divider
const int SOIL_DRY = 3000;      // calibrate: sensor in air
const int SOIL_WET = 1300;      // calibrate: sensor in a glass of water
const uint64_t SLEEP_MIN = 10;

int readSoilPercent() {
  digitalWrite(SOIL_POWER_PIN, HIGH);
  delay(300);
  long sum = 0;
  for (int i = 0; i < 10; i++) { sum += analogRead(SOIL_PIN); delay(20); }
  digitalWrite(SOIL_POWER_PIN, LOW);
  int pct = map(sum / 10, SOIL_DRY, SOIL_WET, 0, 100);
  return constrain(pct, 0, 100);
}

float readBatteryVolts() {
  return analogReadMilliVolts(BATT_PIN) * 2 / 1000.0;  // 1:2 divider
}

void setup() {
  pinMode(SOIL_POWER_PIN, OUTPUT);
  analogSetAttenuation(ADC_11db);
  int soil = readSoilPercent();
  float batt = readBatteryVolts();

  WiFi.mode(WIFI_STA);
  WiFi.begin(WIFI_SSID, WIFI_PASS);
  for (int i = 0; i < 40 && WiFi.status() != WL_CONNECTED; i++) delay(250);

  if (WiFi.status() == WL_CONNECTED) {
    HTTPClient http;
    http.begin(PLANTCARE_URL);
    http.addHeader("Content-Type", "application/json");
    String body = String("{\"device\":\"ESP32-solar\",\"soil_moisture\":[") + soil +
                  "],\"battery_v\":" + String(batt, 2) + "}";
    http.POST(body);  // 200 = stored
    http.end();
  }
  WiFi.disconnect(true);
  esp_sleep_enable_timer_wakeup(SLEEP_MIN * 60ULL * 1000000ULL);
  esp_deep_sleep_start();
}

void loop() {}

JSON format

POST /api/sensors/json/<token>. Fields: soil_moisture (number or list, %), soil_temp, temp (°C), humidity (%), battery_v, solar_v. Test with curl:
curl -X POST -H "Content-Type: application/json" \
  -d '{"soil_moisture":[34],"temp":18.2,"battery_v":3.95}' \
  http://192.168.1.10:3000/api/sensors/json/<token>

Lithium battery: use a protected cell and charger module, and don't leave the battery in direct sun. Go to Sensors

Integrating with AI

AI needs clean timestamps and calibrated values. Start with logging — the model comes later.

  1. Measure — sensor → microcontroller (ESP32).
  2. Export — MQTT or HTTP → Home Assistant / Node-RED / your Next API later.
  3. Log — CSV or DB: time, plot, metric, value, unit.
  4. Model — only once data is clean: watering hints, anomalies.

Simple architecture

Sensor → ESP32 → MQTT/HTTP → HA / Node-RED / API
              ↓
       CSV / log (timestamp + value)
              ↓
       later: model / alert

Without calibration and timestamps, “AI” guesses wrong. Start with honest measurement.

Farm section · My plots